So before I went cross country on a recent road trip, I decided to engage in a little hillbilly fun and install a CB (Citizen’s Band) Radio. This is the rest of the story.
So yesterday, I discussed the ins and outs of picking the parts for a CB radio installation. Today, I want to talk about the troubles of actually slamming all of those bits into a small car. A very small car. A MINI. It was surprisingly smooth, though like choosing hardware, it went in steps:
1. Plan your radio and antenna locations
2. Consult as many resources as possible on how to remove interior panels and access the battery through the firewall
3. Install the antenna
4. Install the PA horn
5. Install the power leads
6. Install the power
Plan Your Radio and Antenna Location
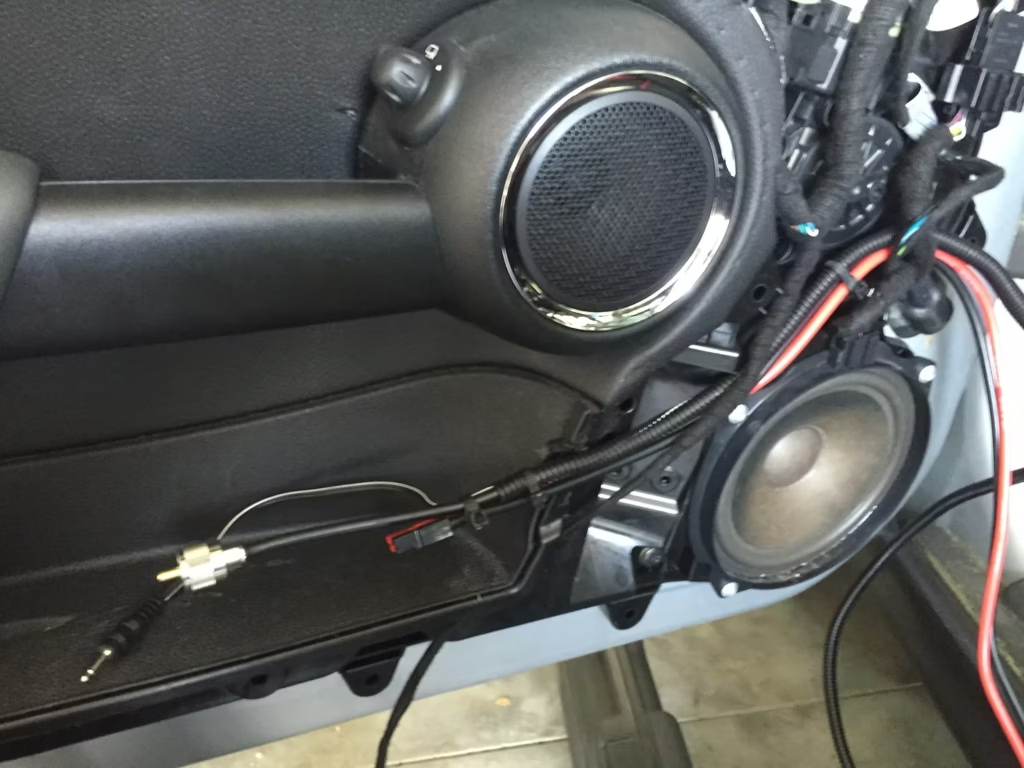
This one can be very tough, especially in such a small car. For safety’s sake, stay away from dashboard mounting. The passenger-side airbags are designed to deploy through a special cutout section, but the force may still cause the entire top dashboard piece to shift dramatically and throw whatever equipment you have attached to it violently around the car. It’s important to also consider your passengers’ comfort, how safely you can bolt it down, how difficult it will be to run cabling to it, and how difficult it will be for you access it while driving. If you’re mounting it far out of the way and don’t intend on manipulating it much, you may also consider purchasing an external speaker and an extension cord for the mic. My wife actually found a perfect location right in the driver’s side door that fit the Uniden PRO520XLperfectly!
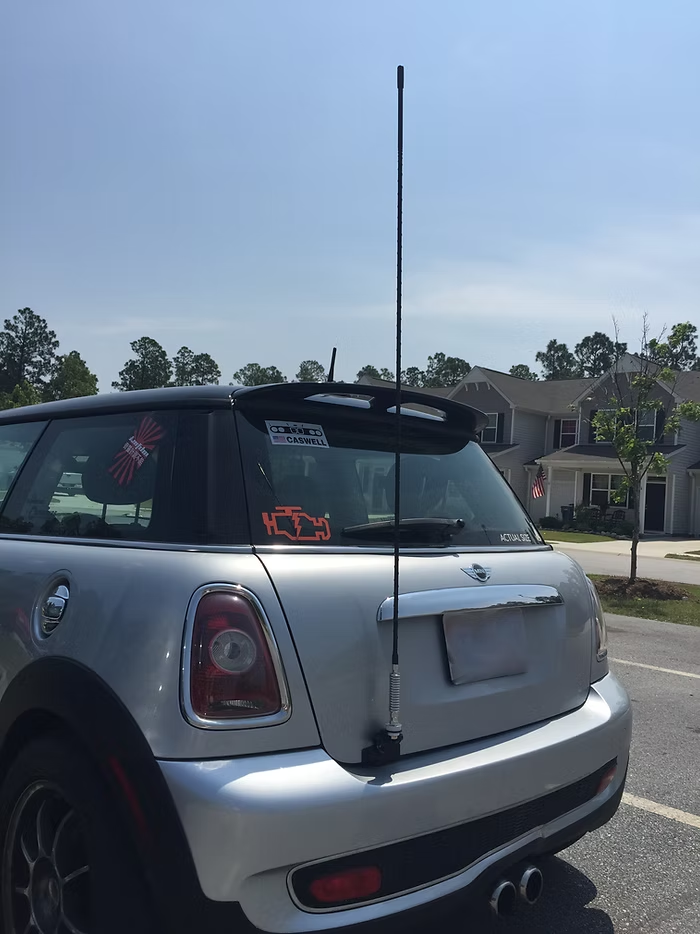
Optimally, the antenna would be mounted in the middle of the largest expanse of metal on a car: the roof. Since I have a full-length sunroof, this wasn’t going to work, so I opted for the Comet HD-5 3/8-24 Trunk Lip Mount. Since we settled on a driver’s side installation, I used the left bottom lip of the hatch, where it bolted up smoothly. I torqued the set screws until they clearly bit through the paint to ground out the mount, attached an antenna spring, and screwed the 4-foot Firestik antenna right on. That spring should help protect the setup from getting too damaged in the event that it gets snagged or pulled on (damn neighborhood kids).
Not only can I still open the hatch, it clears the garage! Victory! After this, it’s time to start digging into some books on how to get behind all of the interior panels. Haynes, Bentley, etc all make great feature-packed books that go in-depth on various models of car and truck.
After that, it was just a matter of running the cabling behind the interior panels up to the driver’s side kick panel (next to the hood release) and to tune it precisely to my desired frequency.
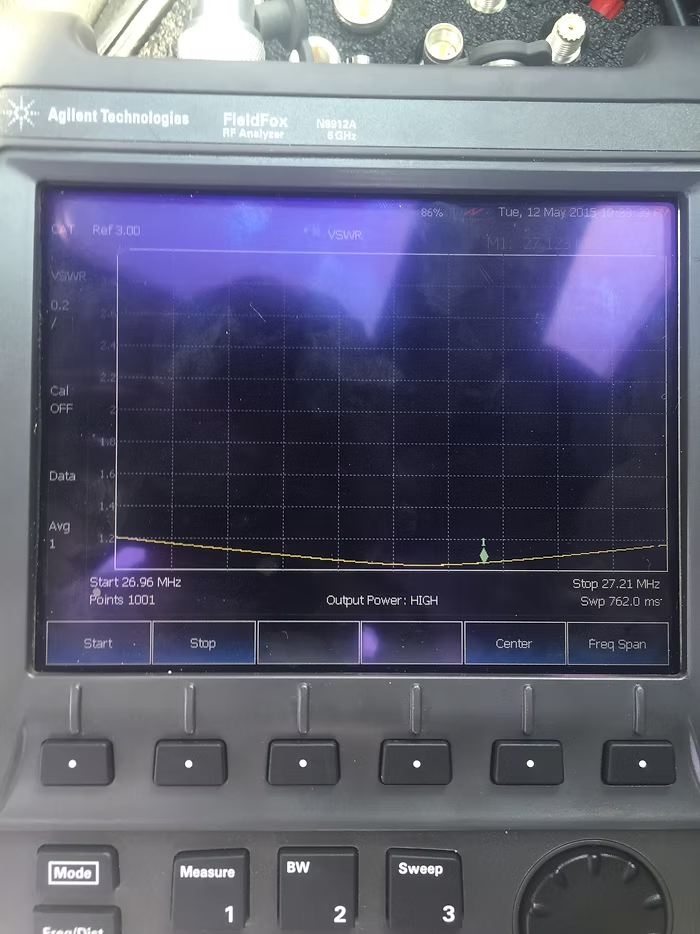
Every antenna has a specific frequency that it is most resonant or efficient at working in. This is important when receiving, because it cleans up the signal. It’s crucial when transmitting, because electrical power that doesn’t get turned into radio waves gets reflected back into the radio itself and can blow it out. Brilliantly, the Firestik includes a removable rubber tip on the end, exposing a small screw. Once hooked up to a Voltage-to-Standing-Wave-Ratio (VSWR) meter, you can slowly dial in the screw to the optimal frequency; for CB radio, it’s channel 19 or 27.185MHz.
Install the Public Address Horn
Disclaimer: There really isn’t a good use for this.
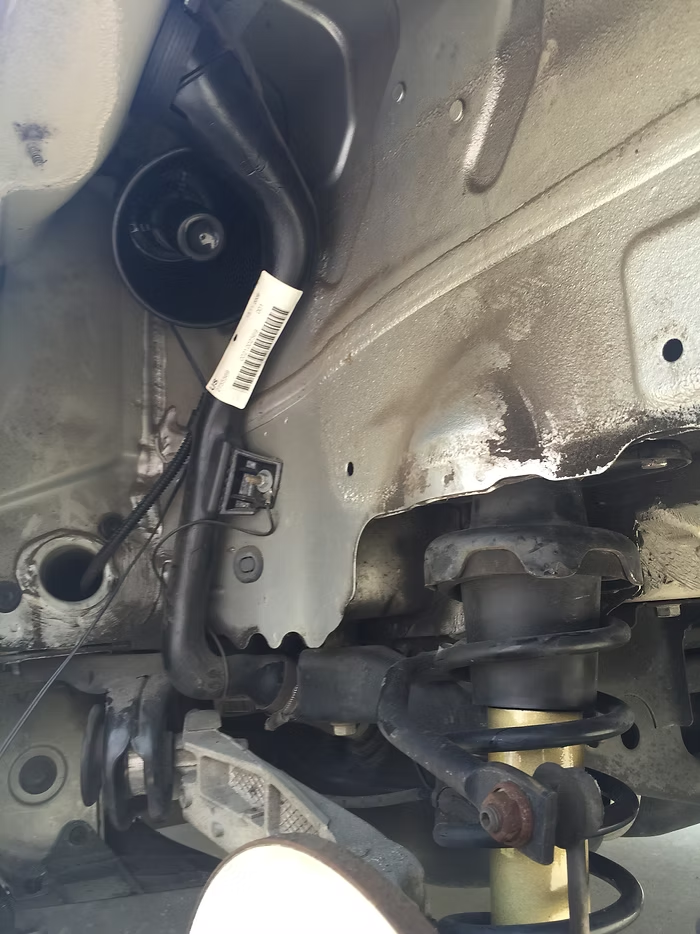
… so why do it? Because I could, it was cheap, and it’s funny. I just jacked the MINI up into the air and went hunting around for a nice empty space where I could drill and bolt, glue, or just shove it. All I really needed it to do was point down and sit in a spot where I could figure out how to run its cable inside. Most people who install these mount them somewhere in the engine bay, but there’s absolutely no room for that inside of a MINI, so I sought other options. While at first I considered the rear bumper, I finally found a great empty area up above the driver’s side rear fender liner. I pulled out the liner and found that the horn could be snugged perfectly inside and reinforced with just a bit of epoxy.
Since the MINI has a bit of plastic body cladding running along the bottom of the body panels, all I needed to do was pry them back enough to run the skinny audio cable inside of them, terminating by the door’s hinge.
Install the Power Leads
Warning: always disconnect your battery before working on your car’s electrical system
This part ended up going much smoother than I expected. First, I removed the battery. Afterwards, I went to building the cabling I would need. Crimping and building the Anderson Powerpole connectors was a little tedious at times, but the finished product was great. Working backwards, I cut down the bare leads coming off of the back of the radio to about ten inches (leaving its own inline fuse) and finished it in a set of Powerpoles, then terminated both ends of both ten-foot 10-gauge power cable runs. I thought twenty feet would be way too much, but it was just about right to have enough slack in the line to wind, zip tie, and tuck.
One of the ten-foot runs goes from the inside of the door to the center console. The next one goes from the center console up through the small hole I clipped in the big rubber grommet of the MINI’s firewall. Most automobile manufacturers leave something like that for running new cabling through there. Fortunately, the MINI’s pops out right next to the battery compartment towards the rear of the engine bay on the passenger’s side. I then took my pre-built 40-amp fused connectors and zip-tied them inline with the positive and negative leads. Finally, I replaced the battery, hooked up the circuit and tested everything out. Got it!

Install the Radio
Once I had the RF, power, and PA cables all ran, it was time for a test before finalizing the installation. I hooked everything to the radio and it fired up and started pulling a great signal right away. The PA horn worked perfectly… absolutely no issues! So excited! To finalize the installation, I popped off the door card and used a Dremel on the plastic to bore some holes. Having the door card off also made it easier to wedge the radio in there. There wasn’t quite enough clearance to use the radio’s included mounting bracket, but the fit is so snug, it just doesn’t seem like a factor. I may try to fab something up later.
Finally, I drilled a couple of holes in the door card to place the mic mount. It’s snug, out of the way, but easily accessible. I reinstalled the door card, checked everything out, and now it’s working great!
Final Thoughts
I learned a lot and it should make my next radio installation go even smoother. The antenna has been fantastic and isn’t particularly intrusive; in fact many folks don’t even notice it unless I point it out. The only thing I would have done differently is used a slightly thinner power cable. 10-gauge was kind of overkill and make crimping the connectors a bit harder than it needed to be for the amount of power that could travel this circuit. Overall, I’m really pleased with how this installation turned out and I’m really looking forward to installing a 2m/70cm radio next!

