So before I went cross country on a recent road trip, I decided to engage in a little hillbilly fun and install a CB (Citizen’s Band) Radio. Why?
- I don’t yet have an amateur radio license.
- I wanted to see how difficult radio installation was on my own before attempting anything more complicated.
- I want to get my amateur radio license and run a mobile station; I figured that this would be a good test run.
- It’s funny.
So, just what are the primary parts for a mobile radio setup and what did I use?
The Typical Parts List
- Antenna
- Antenna mount
- Antenna cabling
- Radio
- Power cabling
- Terminations, adapters, and tools as needed
You may have noticed that I listed antenna first. This is by far and away the most crucial part to any good communication system. There are a lot of great antennas available on the commercial market as well as a ton of great resources for those brave soldering-gun-heroes to roll their own. If you don’t figure out your antenna, you don’t even need to look at radios.
Number two is where are you going to mount the darned thing? This depends on the application; homes are fairly easy, trucks aren’t too bad, cars are a pain in the butt. Of course, trying to do this on a MINI presents its own special challenges, but hey… why not? There are a lot of great mobile mounts; all will require some level of damage to your car, so be warned. Even a trunk lip mount like I used has a group of set screws that need to dig into the sheet metal to ground the antenna. Others prefer to use a magnetic mount (which will ultimately wobble on a typical curved automotive surface and create ugly swirly scratches on the paint) or even to drill out hole on their body for an NMO (New Motorola) mount.
Number three is antenna cabling, which should be adequately shielded against all of the electro-magnetic noise that might occur when a one-ton piece of non-earth-grounded metal containing an electric generator is traveling at high velocity by a train track. Additionally, the thickness of the cable should be considered based on where you are going to mount the antenna and radio itself, with special care laid to know where it might get pinched or need to pass through to get to the radio. Depending on your comfort and level of skill, you may with to purchase your own cabling and build custom terminations yourself.
Number four is radio, but with CB radios all being fairly cheap, it will depend on your needs. There aren’t any particular killer features in the CB market, so pay close attention to form factor, durability, and power.

Number five is power cabling, including all of the fusing and connectors you’ll need. I highly suggest that you build a new fused circuit directly off of the battery, but some have had success running off of the accessory circuit (your 12VDC power connectors) depending on the power draw and how much electrical noise is carried over to your radio. It’s not uncommon for folks who have ran their radio off of the accessory circuit to report significant static and noise when both transmitting and receiving. For the connectors themselves, I’m a huge fan of Anderson Powerpoleconnectors; they’re easy to work with and great for expansions.
Number six is the catch-all. You’ll find yourself invariably needing a random adapter or extra connectors because you dorked up a crimp. While you’re at it, make sure you consider any additional specialty tools you might no have, such as wire strippers, crimpers, and random tools to take apart your car.
So what did my shopping list look like?
My Parts List
- Antenna: A 4-foot Firestik
- Mount: Comet HD-5 3/8-24 Trunk Lip Mount
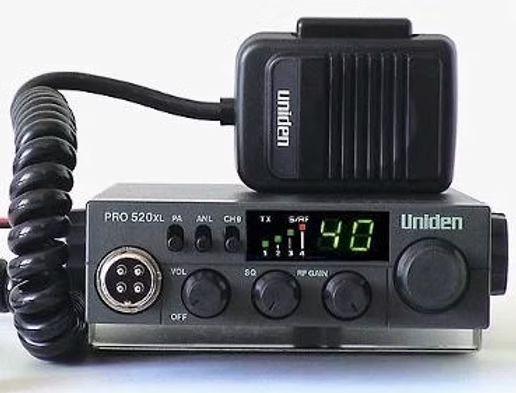
- Radio: Uniden PRO520XL
- Power Cabling: 20 feet of 10-gauge silicone wire with both black and red cables, a bag of Anderson Powerpoleconnectors, and a pair of 40-Amp fuses, already terminated with ring and Powerpole connectors
- Miscellaneous: a 90-degree PL-259/SO-239 adapter, some epoxy, wire loom, and plenty of UV-resistant zip-ties
- Public Address Speaker: Pyle PSP8 All-Weather 5-inch
I chose the antenna because it had a tremendous number of solid reviews and was easily tunable. The trunk mount made the most sense, since I had seen other MINI Cooper’s using them for other transmitters and the sunroof made magnetic and NMO mounts less-than-practical. The radio was chosen primarily for its small size and highly-respected durability; I figured that I would have an easier time placing this one than a larger unit with more features. You’ll notice that I skipped the antenna cabling; fortunately, the Comet mounts already come with about 16-feet of coaxial cable, so that made things easy. I ordered way more power cabling and connectors than I thought I would need; needless to say, I’m glad that I did. The miscellany that I ordered was mostly to ease the installation and try and keep it somewhat tidy. Finally, the PA speaker… well, there’s no good reason for that other than it was cheap, funny, and the radio supported it. I figured that I would decide where to mount it later.
Stay tuned for Part 2!